With only a few weeks before I start my new job, I feel like now is the time to experiment with nail art that I might not be able to get away with at work. Well, at least until I get to know people a little better.
I've been dying to try this half-moon manicure trend. Maybe I shouldn't call it a trend, since it's been around for so long that it has kind of gone mainstream. There's a lot of nail art that is so popular right now, and this is one of types that an average girl can do at home.
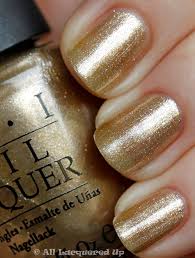
I think the most fun part about this manicure is picking out what colors you're going to use. Since I'm cheap, I like to use combinations of nail polish that I already have. I think this actually makes life easier, since I tend to get paralyzed by indecision when I have too many choices. Gold and silver are really nice neutrals that can work with most nail polish colors. I used this OPI gold color (Glitzerland) that I use primarily around the holidays and this gorgeous Ulta color peacock green color (Envy). (I have to say that I think the quality of this Ulta polish is quite a bit worse than other salon-quality nail polishes. It chips much more quickly than I would normally expect.

Basically, all you have to do is:

I've been dying to try this half-moon manicure trend. Maybe I shouldn't call it a trend, since it's been around for so long that it has kind of gone mainstream. There's a lot of nail art that is so popular right now, and this is one of types that an average girl can do at home.
I think the most fun part about this manicure is picking out what colors you're going to use. Since I'm cheap, I like to use combinations of nail polish that I already have. I think this actually makes life easier, since I tend to get paralyzed by indecision when I have too many choices. Gold and silver are really nice neutrals that can work with most nail polish colors. I used this OPI gold color (Glitzerland) that I use primarily around the holidays and this gorgeous Ulta color peacock green color (Envy). (I have to say that I think the quality of this Ulta polish is quite a bit worse than other salon-quality nail polishes. It chips much more quickly than I would normally expect.
Basically, all you have to do is:
- Start with a standard base coat.
- Layer on the color you want at the base of your nails (the half-moon). You don't have to extend the polish all the way to the tips, but you can. You may want more than one layer of polish at the base depending on the opacity of your polish.
- Wait until the polish dries completely. This could take as much as an hour or more to be safe.
- Put on your hole reinforcement stickers. You can get these from your local Staples or other office supply store.
- Layer on your top color that you want to extend to your tips. Layer it on thick on the first try, then immediately peel off the sticker. Do this one nail at a time so you can peel the sticker off while the top layer of polish is still wet!
- Use your trusty top coat. I recommend Seche Vite.

It's a little time consuming, but I definitely think it's something fun to try at home! If you want to make this look less edgy, you can try more muted colors. How about a pale pink half-moon with a gray or taupe like Chinchilly at the tips? You can also do a smaller gold moon with a more traditional color like red; or colors with less contrast (a berry + plum combo) to make a little less of a statement but still have a little fun with it.


