November 2, 2012

Experimenting with Half Moons

With only a few weeks before I start my new job, I feel like now is the time to experiment with nail art that I might not be able to get away with at work. Well, at least until I get to know people a little better.

I've been dying to try this half-moon manicure trend. Maybe I shouldn't call it a trend, since it's been around for so long that it has kind of gone mainstream. There's a lot of nail art that is so popular right now, and this is one of types that an average girl can do at home.

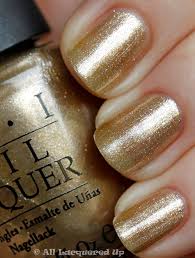
I think the most fun part about this manicure is picking out what colors you're going to use. Since I'm cheap, I like to use combinations of nail polish that I already have. I think this actually makes life easier, since I tend to get paralyzed by indecision when I have too many choices. Gold and silver are really nice neutrals that can work with most nail polish colors. I used this OPI gold color (Glitzerland) that I use primarily around the holidays and this gorgeous Ulta color peacock green color (Envy). (I have to say that I think the quality of this Ulta polish is quite a bit worse than other salon-quality nail polishes. It chips much more quickly than I would normally expect.


Basically, all you have to do is:

  1. Start with a standard base coat.
  2. Layer on the color you want at the base of your nails (the half-moon). You don't have to extend the polish all the way to the tips, but you can. You may want more than one layer of polish at the base depending on the opacity of your polish.
  3. Wait until the polish dries completely. This could take as much as an hour or more to be safe.
  4. Put on your hole reinforcement stickers. You can get these from your local Staples or other office supply store.
  5. Layer on your top color that you want to extend to your tips. Layer it on thick on the first try, then immediately peel off the sticker.  Do this one nail at a time so you can peel the sticker off while the top layer of polish is still wet!
  6. Use your trusty top coat. I recommend Seche Vite.


It's a little time consuming, but I definitely think it's something fun to try at home! If you want to make this look less edgy, you can try more muted colors. How about a pale pink half-moon with a gray or taupe like Chinchilly at the tips? You can also do a smaller gold moon with a more traditional color like red; or colors with less contrast (a berry + plum combo) to make a little less of a statement but still have a little fun with it.

October 24, 2012

Lovely Leftover Leather

I received a Kindle for Christmas 2010. What does that have to do with crafting? Well, it turns out that the leather cover I purchased had a defect that interfered with the Kindle's circuits. Amazon was kind enough to send me a new cover, but I felt bad that the cover was going to go to waste. As someone who strives to be more green, I decided to keep the cover and make a bracelet out of the leftover leather.


And then the cover sat in my nightstand drawer for two years.

But now that I've had some time off, I decided to take action!

I found this DIY leather bracelet on Pinterest and decided that it would be perfect candidate for the leftover leather from the Kindle.


So, I had to strip the leather from the Kindle, which turned out to be the most excruciating part. Instead of just ripping apart the seaming, I had to cut off the sewn edges (like a clamshell plastic package) and then had to use both hands and feet to pry the pink leather off of the plastic reinforcement on the interior because it was glued on so well.. (Place both feet on the binding, step on it, get a corner of leather loose, and then PULL!)


After all that, I ended up with some surprisingly supple leather and started cutting.


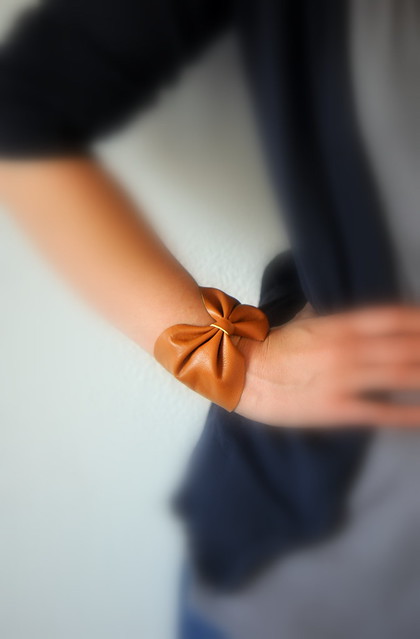
Here are the detailed instructions from Oh The Lovely Things on how to do this yourself with any leftover leather or new leather you decide to purchase. I made a few adjustments for length of the bracelet (since I have a small wrist) and width of the leather (to match the proportion of my small wrist), but I otherwise mostly followed her instructions. I happened to have some big snaps that I had used for a project long ago. The only thing I had to actually purchase was some thread to match the leather where I sewed the snaps. I just cut a few ovals and strips, sewed the leather to secure the bow placement, put on the snaps, and voila!


One tip: instead of just gluing the small leather strip in place like Oh the lovely things suggests, I also sewed the overlapping leather together for a more secure placement. The leather is actually quite absorbent, so I was afraid that the glue wouldn't hold long term.

I have a navy blue cover, too, so I think I may make a few more and give them away as stocking stuffers for the holidays! But, they're so cute that I may just hoard them for myself.


October 19, 2012

Drying Paint

I've been obsessed with my nails lately. In an effort to recreate a look I saw on Pinterest...


...I experimented with trying to create an orangey coral and gold combination. What I created wasn't really close, but I still like the results.


It's a little sloppy, but I liked the dry brush technique look that I ended up having to use to blend the lines between the red and gold. I just painted on the red base layer and then brushed the gold on top like something of a french manicure style. The line was sloppy, so I then took the brush that had air dried for a few seconds and brushed down toward the base of the nail to give it a choppier finish.

June 9, 2012

The Tiniest Entryway Ever

I wrote a post almost at the beginning of my blogging about a little piece of IKEA furniture I repurposed for my entryway. It has served me and my husband well over the last few years, mostly because it gave us a way to sit and store at the same time in our tiny entryway.

Over time, I've noticed how much it gets in the way of getting in and out of the house. The whole landing inside our actual condo measures only 3.5' x 3.5', so anytime more than one person wants to enter, someone has to step totally behind the door or is forced to walk on the super narrow portion of my winding staircase. Sorry to all you visitors who have thought that you were going to tumble to your deaths.

So, I finally decided to do a little redecorating. Let me tell you that it's not easy to find furniture that will fit in that area. I went through dozens of side tables that both did or didn't fit the measurements of the hallway. Plus, I like to have stuff that is unique, but that doesn't cost a fortune. I at least have found some non-obvious retail sites in the last several months that kind of fit the bill. 

Check out the before...


...and the after...


I can't bear to get rid of the trunk yet, so it has found a home on the back landing of our condo.

Here are a few resources for those that are looking for decorating options that aren't the typical retail options.
  • Ballard Designs
  • Home Decorators Collection (yes, this is a Home Depot company, but it's still a pretty decent resource)
  • Jonathan Adler for accessories - he has a very specific look, but I love it.
  • Global Views is a wholesaler that we used when we were working with a decorator. One great thing about working with a decorator is the insane amount of money that you can save off of retail. Oddly, hiring a decorator can pay for itself just based on the furniture discount if you are planning on making a few major purchases.

April 3, 2012

A Cupcake Christmas

Almost every November, the panic starts to set in. What the heck am I doing for the greeting card this year? And how am I going to get it done with all the craziness over the holidays? As I mentioned a few posts ago, I usually need to have an idea and materials purchased going into Thanksgiving. This year, I came up with that idea almost a year ahead of time. So this year's batch was a piece of (cup)cake. Almost.

If you've read any of my posts before, you pretty much know how the construction process for my greeting cards works. So, I'm turning over a new leaf. Less verbose descriptions, more photos to tell the story.


Fun Nordic holiday paper that I used for my muffin papers:


Beautiful microbeads from Martha Stewart that created the little non-pareil decorations. Note that these do not stick easily to paper, even using a fair amount of glue from a glue pad. I'm fairly sure that they fell apart in the mail and created a mess for those who received them:


Frosting the cupcakes was time consuming and messy.

The working area. This was a multistep process where I, 1.) Cut out the cupcake shapes, 2.) Glued the "paper cups" and the un-decorated cupcake tops to the card, 3.) Put "sprinkles" on almost half of the cupcake tops, and 4.) Glued on the final cupcake tops and then added the "tree-topper". Oh, and then of course I had to delicately write out the cards for fear that all the little micro-beads would fall off.

Work in progress:

 The finished product:


March 4, 2012

Nailing It

With all the craziness that work has been throwing my way, I sometimes need a little escape for just a few seconds. I joined Pinterest in late December or early January, and at the time, most of my friends hadn't joined. Now, there are so many people to follow that I can barely keep up with the latest posts. Everyone I've talked to about it has said that it's addictive; "digital crack" was what one article called it. So anytime I need to put my brain at rest, I make a little trip to the world of pretty things.

One thing that I manage to make time for are manicures. I have loved the new nail art trend that seems to be popping up. I remember my first nail art when I was little; my mom let me get a little flower on my nails at the nail salon next to the Chinese food place we always ate at. It was really special, and I treasured the opportunity to make my short piano-playing nails look pretty. But now, since I am too cheap to pay for manicures, I haven't thought of it as an option for me. 

Enter Pinterest.

Daily Candy had a board titled "Nailed" with lots of cool ideas for nail art. Not all of it is stuff that I can execute on my own, but I found two specific ideas that I've tried in the past few weeks that were actually quite easy. I call the first version champagne nails. 


These turned out to be relatively easy. I already had a dark shiny gray polish from MAC and a gold polish from OPI. I even had a little sparkly gold topcoat, but it turned out that the glitter was too fine to really show up. With the help of a toothpick, I managed to make a reasonable facsimile. Here are the results of my own attempt. As mangled as I thought these were, I got a lot of compliments. From the office to the hair salon, girls everywhere were mooning over them.


By the way, I really like the blog of the woman whose site these nails were originally posted on. Check it out here.

The second set was even easier to execute. These have a sexy name that I can't take credit for: Galaxy nails.


Basically, you just need a mishmash of cool-toned colors. I used a range of blues, greens, purples, and a shimmery silver to try to recreate the look. 


Easy peasy! It's a little hard to see below, but I just applied a base coat of the Revlon navy color, and then swooped on layers of each of the other shades (in order that they are shown here), and used the silver to make a little Milky Way across each nail. Personally, I love the swirly look that I was able to achieve on mine, even versus what the original looked like. I made vertical, horizontal and diagonal strokes to make it look like some crazy aurora borealis moving across my nails. The best compliment that I could have been paid came today when I was at the register at a spa. The cashier said, "Oh my gosh, are those Galaxy nails? You did such a great job!"


One final lesson learned from this photo session is that it's really difficult to capture nails in artificial light at night. Best to leave those things to the beautiful light of day.


Addendum:

Another idea for nails from Pinterest led me to this little experiment. It's difficult to see in the picture, but it's a layer of Essie Chinchilly with some sparkles just at the tip of the nail. Subtle but sparkly!


October 24, 2011

Thinking of Christmas on a 70-Degree Day

This is summer's last hurrah. As I writing this, I'm sitting with tea in hand on my deck in Chicago, and it's about to be one of the last nice days of the year. The forecast says that it's going to be 70 degrees today and the next few days, so I intend to make the most of it. Which is why it's strange that I'm already thinking about Christmas.

Many of you already know that I put out a handmade Christmas card every year. Maybe you noticed that I hadn't posted about last year's card? Well, that's because I didn't start thinking about the darn thing until so late in the year that I was scrambling to get it done.

I originally had an idea that I wanted to do something with a sewn pattern, but I wasn't sure how to really create a nice looking line, how it might damage my sewing machine, or if I would even be able to execute it.

So I decided to stick to a technique I knew would work: good old-fashioned threading a yarn through a hole. I've done this before on one of my first cards but with ribbon. It's the card that's the second from the left in this picture.

So, I came up with the idea of stringing mittens on a clothesline for the theme. Frankly, I was running out of time, and I knew that I didn't have time to screw around with cutting out everything by hand this year. I typically like to buy materials before Thanksgiving and start the heavy construction work over the holiday, if not earlier. Even with the Thanksgiving start, depending on the level of labor, putting together the cards can stretch well into the week before Christmas. (Some people even get their cards around the new year.)

This past year, I didn't even start ideating until right before Thanksgiving, so I knew that I would have to make it simple. In prior years, I frequently cut out shapes by hand after printing them on paper. But I finally decided to join scrapbookers in the 20th century by making use of paper punches. I ordered a tiny mitten punch from some random craft website and hoped that it would turn out to be the right size when it arrived. Luckily, it was, so I proceeded to punch out hundreds of mittens from different pieces of scrap paper I had in my craft drawer.


I used some multicolored yarn and strung them on the card with a little "Happy Holidays" message on each end of the string.


One thing that I'm still not sure was the right decision was to leave the mittens loose on the string instead of knotting them to the string to prevent them from shifting around. How did they arrive in the mail? Were they all clumped or creased or funny-looking by the time they got to the recipients?


All in all, this was not my best card project, but I feel pretty good about how it turned out given time constraints. I have grander plans for this year's card. We'll see what happens. Maybe I'll even enter the Paper Source Holiday Card Contest.