I received a Kindle for Christmas 2010. What does that have to do with crafting? Well, it turns out that the leather cover I purchased had a defect that interfered with the Kindle's circuits. Amazon was kind enough to send me a new cover, but I felt bad that the cover was going to go to waste. As someone who strives to be more green, I decided to keep the cover and make a bracelet out of the leftover leather.

And then the cover sat in my nightstand drawer for two years.
But now that I've had some time off, I decided to take action!
I found this DIY leather bracelet on Pinterest and decided that it would be perfect candidate for the leftover leather from the Kindle.

So, I had to strip the leather from the Kindle, which turned out to be the most excruciating part. Instead of just ripping apart the seaming, I had to cut off the sewn edges (like a clamshell plastic package) and then had to use both hands and feet to pry the pink leather off of the plastic reinforcement on the interior because it was glued on so well.. (Place both feet on the binding, step on it, get a corner of leather loose, and then PULL!)

After all that, I ended up with some surprisingly supple leather and started cutting.

Here are the detailed instructions from Oh The Lovely Things on how to do this yourself with any leftover leather or new leather you decide to purchase. I made a few adjustments for length of the bracelet (since I have a small wrist) and width of the leather (to match the proportion of my small wrist), but I otherwise mostly followed her instructions. I happened to have some big snaps that I had used for a project long ago. The only thing I had to actually purchase was some thread to match the leather where I sewed the snaps. I just cut a few ovals and strips, sewed the leather to secure the bow placement, put on the snaps, and voila!


One tip: instead of just gluing the small leather strip in place like Oh the lovely things suggests, I also sewed the overlapping leather together for a more secure placement. The leather is actually quite absorbent, so I was afraid that the glue wouldn't hold long term.
I have a navy blue cover, too, so I think I may make a few more and give them away as stocking stuffers for the holidays! But, they're so cute that I may just hoard them for myself.

But now that I've had some time off, I decided to take action!
I found this DIY leather bracelet on Pinterest and decided that it would be perfect candidate for the leftover leather from the Kindle.
So, I had to strip the leather from the Kindle, which turned out to be the most excruciating part. Instead of just ripping apart the seaming, I had to cut off the sewn edges (like a clamshell plastic package) and then had to use both hands and feet to pry the pink leather off of the plastic reinforcement on the interior because it was glued on so well.. (Place both feet on the binding, step on it, get a corner of leather loose, and then PULL!)

After all that, I ended up with some surprisingly supple leather and started cutting.

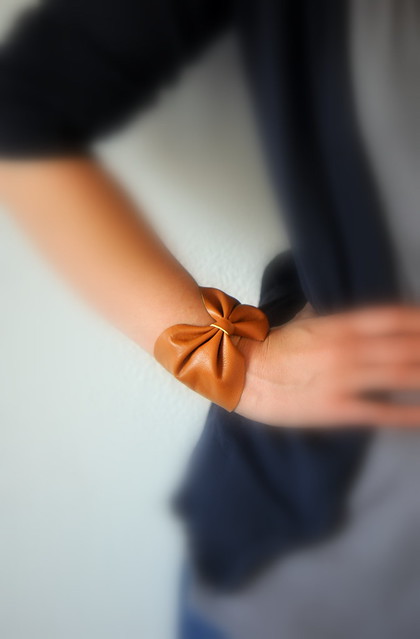
Here are the detailed instructions from Oh The Lovely Things on how to do this yourself with any leftover leather or new leather you decide to purchase. I made a few adjustments for length of the bracelet (since I have a small wrist) and width of the leather (to match the proportion of my small wrist), but I otherwise mostly followed her instructions. I happened to have some big snaps that I had used for a project long ago. The only thing I had to actually purchase was some thread to match the leather where I sewed the snaps. I just cut a few ovals and strips, sewed the leather to secure the bow placement, put on the snaps, and voila!


One tip: instead of just gluing the small leather strip in place like Oh the lovely things suggests, I also sewed the overlapping leather together for a more secure placement. The leather is actually quite absorbent, so I was afraid that the glue wouldn't hold long term.
I have a navy blue cover, too, so I think I may make a few more and give them away as stocking stuffers for the holidays! But, they're so cute that I may just hoard them for myself.


