Showing posts with label sewing. Show all posts

October 24, 2012

Lovely Leftover Leather

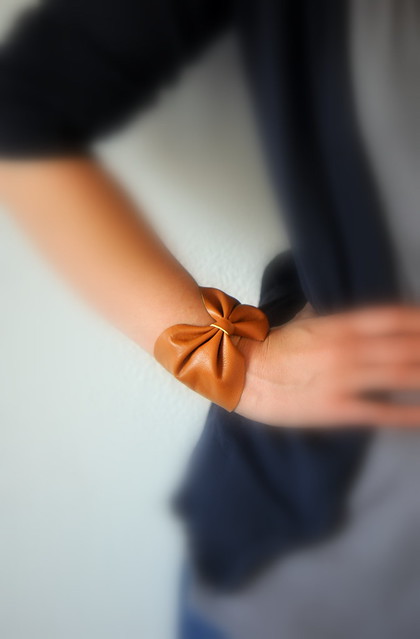
I received a Kindle for Christmas 2010. What does that have to do with crafting? Well, it turns out that the leather cover I purchased had a defect that interfered with the Kindle's circuits. Amazon was kind enough to send me a new cover, but I felt bad that the cover was going to go to waste. As someone who strives to be more green, I decided to keep the cover and make a bracelet out of the leftover leather.


And then the cover sat in my nightstand drawer for two years.

But now that I've had some time off, I decided to take action!

I found this DIY leather bracelet on Pinterest and decided that it would be perfect candidate for the leftover leather from the Kindle.


So, I had to strip the leather from the Kindle, which turned out to be the most excruciating part. Instead of just ripping apart the seaming, I had to cut off the sewn edges (like a clamshell plastic package) and then had to use both hands and feet to pry the pink leather off of the plastic reinforcement on the interior because it was glued on so well.. (Place both feet on the binding, step on it, get a corner of leather loose, and then PULL!)


After all that, I ended up with some surprisingly supple leather and started cutting.


Here are the detailed instructions from Oh The Lovely Things on how to do this yourself with any leftover leather or new leather you decide to purchase. I made a few adjustments for length of the bracelet (since I have a small wrist) and width of the leather (to match the proportion of my small wrist), but I otherwise mostly followed her instructions. I happened to have some big snaps that I had used for a project long ago. The only thing I had to actually purchase was some thread to match the leather where I sewed the snaps. I just cut a few ovals and strips, sewed the leather to secure the bow placement, put on the snaps, and voila!


One tip: instead of just gluing the small leather strip in place like Oh the lovely things suggests, I also sewed the overlapping leather together for a more secure placement. The leather is actually quite absorbent, so I was afraid that the glue wouldn't hold long term.

I have a navy blue cover, too, so I think I may make a few more and give them away as stocking stuffers for the holidays! But, they're so cute that I may just hoard them for myself.


January 17, 2010

Hike Up That Skirt

My mother told me when I was younger that learning to sew would be an essential life skill. As a wife, I would be responsible for taking care of all the housework and ensuring that my husband's pants were properly hemmed. It turns out that my mothers' sewing mini-courses didn't really stick with me over time, so my skills are a little sub par. Luckily, I had a pretty strong backup by going to college, finishing grad school, and having a career.

Still, I can't deny that knowing how to sew is a useful skill. This week, I've tried to put my skills to use - not on my husband's clothes, but on my own. It is an experiment in how I can improve my current wardrobe. No, I'm not extremely petite. I'm actually 5'4", which is the height of the average American woman. Unfortunately, clothing manufacturers seem to think that we're all Glamazons with 45-in inseams.

I protest! But in the meantime, I have to make do with what I have. Short legs, meet long skirt:


I've had this skirt for a few years now, and every time I wear it, I feel like it makes me even more of a midget than I already am. My legs shrink and become stumpy, and not even the highest heels can rescue the look (as evidenced by the photo above). Short girls, you know what I mean!

As a side note, I've discovered that shopping at teen-oriented stores (like Forever 21) can actually be a better bet than the petites section at a chain store like Banana Republic because of the skirt length and variety of styles. Apparently teenagers like their skirts shorter. And their quality lower.

Anyhow, I decided to take on the gargantuan task of figuring out how to hem a circular hem. If any of you have tried this before, you know that it's not totally easy to create a circular hem that's even and attractive. So, I took advantage of the layered construction of the skirt and decided to make the part that I was hemming invisible by showing only the fluffy crepe layer  (the shiny one that's not currently at the bottom):


So, rip, rip, cut, snip, off come 6 inches of skirt! It was pretty easy to get all that fabric off because of all the seams on the back of the skirt, and there was even enough fabric to leave room for a hem that I could hide underneath the bottom layer.

Using my mom's trusty old sewing machine, I did the best I could to shore up my loose end.

I have to admit that I wasn't being that careful with the hem since I knew it would be mostly hidden, but my hem was REALLY crooked. Plus, when I got to the side seams, there was a fair bit of shortcutting required to make it all join together.

Still, I think that you can't really tell from three feet away - I can just tell that I have knees again!


So, what do you think? An improvement? Creative? Ruined? It's the right time to be thinking about performance reviews, so I'll be wearing the skirt to work next week to get some face-to-face feedback.

Materials used for this project:
  • A skirt that's too long
  • Scissors
  • Seam ripper
  • Black thread
  • A sewing machine

June 28, 2009

Cover Up!

As it may be becoming clear, I am sometimes reluctant to spend money on furniture. Especially if I'm not convinced that I like something, I tend to look for the cheapest solution. Sometimes, I'm stuck in a state of limbo since I assume I'll upgrade in the future; I just don't want to upgrade right now.

This week, it's yet another piece of IKEA furniture that I'm trying to cover up. This time, it's really a cover up. Literally.

I have a television in my bedroom that I would love to get rid of. It's insanely heavy (Sony likes to make 'em solid) and kind of unsightly compared to sleek new LCDs and plasmas. The only problem? It still works great, it's bulky, and it needs something to sit on. Enter the IKEA side table as TV stand:

Blech. Double blech to all the crap that is on the shelves underneath the TV. Crappy DVD player, essential but ugly DVR, old N64 for MarioKart entertainment, and sewing basket for all my stupid odds and ends. Messy, no?

Since all the other wooden furniture in the bedroom is black, I thought covering it up in black fabric might be a good way to make it blend a little better. (Yes, the image above already has the fabric covering on it. The TV was too heavy just to move for the picture.)

I measured the table and bought a length of black duck cloth that covered the entire circumference of the unit plus a little extra for the top. From past experience, I made myself a little diagram to ensure that I didn't screw up the measurements too much:

Then, I marked the cloth with a dressmaker's pencil and cut the cloth along the lines I had marked using a good sharp pair of sewing scissors.


Now comes the hard part for those of us who weren't raised to make clothes for ourselves. I hemmed the bottom and side edges of the cloth with a 3/4" hem by finishing the edge with a zigzag stitch and then hemming a straight stitch hem. Then, I sewed the top cover piece to the side covering leaving one end open. A key move here was basting the fabric. The four images below all show the top fabric basted to the side fabric.

Lastly, I sewed on snaps to fasten the front flap to the overhang I left. I am bad with snaps. See my key lessons below for more on that topic.

The end result doesn't look fantastic, but it looks better than having all my crap exposed:


Plus, there was a huge bonus feature! I built in the snaps because I assumed that I would have to unsnap the cover every time I wanted to use the satellite box/DVR. It turns out that the duck cloth is a loose enough weave that I don't need to unfasten the fabric to use the equipment. Woo!

A few lessons learned on this particular project:
  • Always give yourself a little extra room when working with fabric. It tends to scoot around on you.
  • Basting fabric (pinning two pieces together where you want to sew them) prior to committing needle to fabric is critical. If I hadn't done that, I would have had one very uneven cover since I would have run out of fabric before everything was covered.
  • Snaps are easy to screw up, even though they look simple. Make sure you match up what goes where before you start sewing, because there are a multitude of ways to screw up the orientation. I didn't do this and literally had to resew snaps 6 times. (Quite a feat considering I only had 4 snaps to sew.)
  • Account for the fact that there will be gaps in the fabric unless you plan to cover them up somehow. That's why all shirts are designed with overlap where fabrics connect. I don't why, but I assumed that if every fabric seam was straight, there wouldn't be any wood peeking through. Oops.
Materials used for this project:
  • Tape Measure
  • Black duck cloth: 2 yards
  • Dressmaker's pencil
  • Sewing Scissors (sharp ones)
  • Sewing Machine
  • Black Thread
  • Needle
  • Snaps